# Windows

# Convert install.esd to install.wim

If you’re working with a Windows ISO and need an install.wim file (instead of the default install.esd), follow these simple steps:

##### Step 1: Get the install.esd File

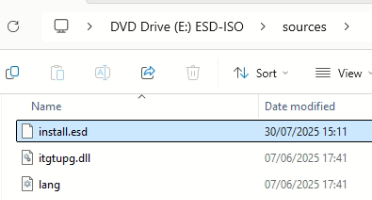
1\. Mount your Windows ISO - Right click the ISO and choose Mount

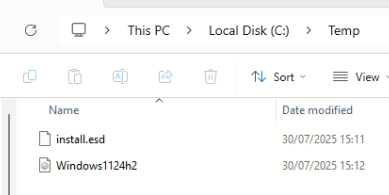
2\. Navigate inside of the Sources folder and copy the install.esd to a folder on your PC, for example C:\\Temp

<table id="bkmrk-"><colgroup><col style="width: 300px;"></col><col style="width: 325px;"></col></colgroup><tbody><tr><td>[![Screenshot 2025-07-30 at 15.45.08.png](https://lukecarter.co.uk/uploads/images/gallery/2025-07/scaled-1680-/Y4TtirRIZxpxC561-screenshot-2025-07-30-at-15-45-08.png)](https://lukecarter.co.uk/uploads/images/gallery/2025-07/Y4TtirRIZxpxC561-screenshot-2025-07-30-at-15-45-08.png)

</td><td>[![Screenshot 2025-07-30 at 15.42.23.png](https://lukecarter.co.uk/uploads/images/gallery/2025-07/scaled-1680-/oANWMth0xDIRuGty-screenshot-2025-07-30-at-15-42-23.png)](https://lukecarter.co.uk/uploads/images/gallery/2025-07/oANWMth0xDIRuGty-screenshot-2025-07-30-at-15-42-23.png)

</td></tr></tbody></table>

##### Step 2: Open Command Prompt as Admin

1\. Click Start, search for CMD, right click it and choose Run as administrator

[![Screenshot 2025-07-30 at 16.09.14.png](https://lukecarter.co.uk/uploads/images/gallery/2025-07/scaled-1680-/WP3Tj9LAwVxNedzb-screenshot-2025-07-30-at-16-09-14.png)](https://lukecarter.co.uk/uploads/images/gallery/2025-07/WP3Tj9LAwVxNedzb-screenshot-2025-07-30-at-16-09-14.png)

2\. In the Command Prompt window, type the below command to change your working directory

```
cd C:\Temp
```

[![image.png](https://lukecarter.co.uk/uploads/images/gallery/2025-07/scaled-1680-/O3u8GXJmsPuQuCtH-image.png)](https://lukecarter.co.uk/uploads/images/gallery/2025-07/O3u8GXJmsPuQuCtH-image.png)

##### Step 3: List Available Windows Editions in the ISO

<span style="white-space: pre-wrap;">Run this command to see what editions of Windows are available in the .esd file </span>

```
dism /Get-WimInfo /WimFile:install.esd
```

This will display a list, look for the edition you need (e.g. Windows 11 Pro) and note down the Index number

[![Screenshot 2025-07-30 at 15.43.25.png](https://lukecarter.co.uk/uploads/images/gallery/2025-07/scaled-1680-/hvd0FewtWdhsYGmo-screenshot-2025-07-30-at-15-43-25.png)](https://lukecarter.co.uk/uploads/images/gallery/2025-07/hvd0FewtWdhsYGmo-screenshot-2025-07-30-at-15-43-25.png)

##### Step 4: Export to install.wim

Now that you know the Index number of the edition you need, run this command to export the .wim (replace 6 with your index number if different)

```
dism /export-image /SourceImageFile:install.esd /SourceIndex:6 /DestinationImageFile:install.wim /Compress:max /CheckIntegrity
```

[![Screenshot 2025-07-30 at 15.44.29.png](https://lukecarter.co.uk/uploads/images/gallery/2025-07/scaled-1680-/2WoNZaz6817brWSo-screenshot-2025-07-30-at-15-44-29.png)](https://lukecarter.co.uk/uploads/images/gallery/2025-07/2WoNZaz6817brWSo-screenshot-2025-07-30-at-15-44-29.png)

This will create an install.wim file in the same folder as your install.esd which you can now use for tools like Windows Deployment Services (WDS) or Microsoft Deployment Toolkit (MDT)